

In animal settings, C&D should be performed regularly during and after infectious disease situations. All surfaces in contact with animals, including the C&D equipment used, should be included.
Use a Systematic Approach
When performing C&D procedures, use a systematic approach to ensure all areas and items are addressed. Work in small sections. Proceed from the cleanest area to the dirtiest, from the highest level (e.g., ceiling) to the lowest (e.g., floor). Marking tape can be used to indicate where C&D steps have been performed. Disinfect floor drains last.
Regardless of the situation, item, or area, the C&D process follows two distinct phases. Both are needed for optimum results. Without cleaning, disinfection does not work.
- Cleaning removes visible organic material that can interfere with the disinfection process.
- Disinfection inactivates or destroys most remaining pathogens on inanimate objects.
The Cleaning Steps
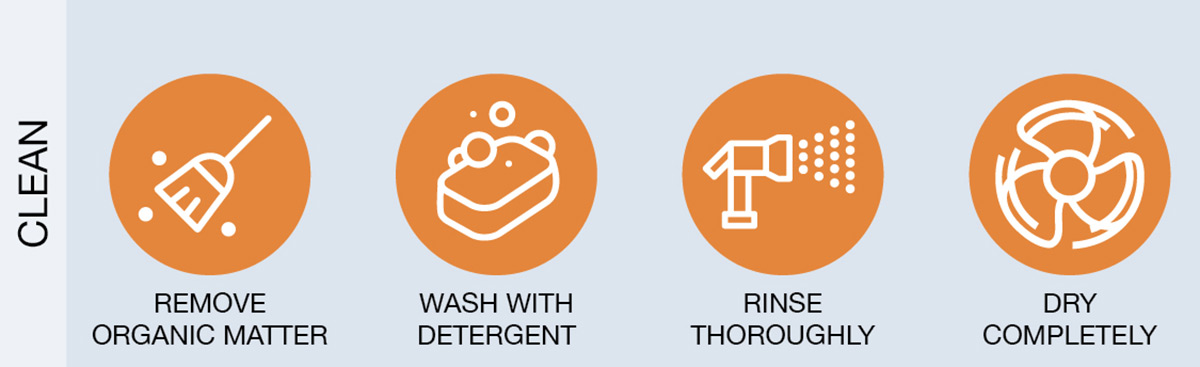
There are four steps for proper cleaning. The goal is to remove manure, bedding, feed, body fluids, dirt, and other debris that can interfere with the disinfection process. This material can hide organisms from the disinfection action. Additionally, disinfectants may react with this material rather than microorganisms, reducing the level of active ingredient available to attack them.
Remove Organic Matter.
Any visible dirt, manure, or other debris should be removed by wiping, brushing, scraping, sweeping, or scooping. In large production facilities, heavy equipment, such as skid steers or manure scrapers, may be needed to handle large quantities of material. This step is sometimes called dry cleaning. The goal is to remove as much visible debris as possible. This step may take considerable time and effort, depending on the object, the area being addressed, or the level of contamination. But it is essential for optimum disinfection!
Wash Surfaces.
Often called wet cleaning, washing the item or area with soap or detergent and water removes material adhered to surfaces. Certain soaps or detergents can destroy some microorganisms.
Mechanical scrubbing or scraping helps to loosen dirt and debris. Areas with deep cracks, pits, pores, or other surface irregularities may require scrubbing with a coarse or wire brush. Pre-soaking or the use of a degreaser may be necessary to remove oils or bodily fluids. Hot water and steam can be effective for cleaning cracks, crevices, and the inside of pipes.
High-pressure sprayers may be effective for removing heavy accumulations of urine and feces or for cleaning porous surfaces (e.g., concrete). However, for highly infectious or zoonotic pathogens, high-pressure systems should be avoided or used with caution to prevent further dispersal and risk to the applicator.
Rinse.
After washing, thoroughly rinse surfaces with clean water to remove any remaining material and cleaning product residue. Soaps or detergents can inactivate some disinfectants. Surfaces should be carefully inspected to ensure they are clean. If dirty surfaces or residual oils are seen, rewash the affected areas.
Dry.
The item or area should be allowed to dry completely before disinfection; excess water, especially on porous surfaces, can unintentionally dilute any disinfectant solution applied. If this is not possible, allow at least 5-10 minutes for the water to drip away. Heating the building, circulating the air with blowers or fans, or using high-pressure air from a compressor can aid in removing excess moisture to speed drying. However, if highly infectious or zoonotic pathogens are suspected, fans or high-pressure systems should be avoided to prevent unintended pathogen spread.
The cleaning step may take considerable time and effort, depending on the object, the area size, or the level of contamination. But it is essential for successful disinfection! It has been estimated that cleaning alone may remove over 90% of bacteria from surfaces. The removal of organic matter helps to ensure that the subsequent disinfection stage has a greater impact on the remaining microorganisms.
Disposal of Debris
Any material removed during the cleaning step should be considered contaminated and handled and disposed of to prevent the spread of microorganisms (e.g., burning, burial, or composting). Disposal must comply with any federal, state, and local requirements.
How Cleaning Works
Soaps and detergents are surfactants, or surface active agents. Surfactant molecules reduce the surface tension of water, which means they increase the ability of water to penetrate, disperse, and remove organic material from surfaces. This is accomplished by their bipolar chemical structure. Each molecule has a polar hydrophilic, or water-loving, head and a nonpolar lipophilic, or fat-loving tail.
The cleaning process in action
- In solution, the surfactant (detergent) molecules have both water-soluble and oil-soluble properties.
- The lipid-loving tails attach to oil, grease, dirt, and debris. The hydrophilic heads interact with water molecules.
- Surfactant molecules can also attach to other lipid-based substances, such as the cell walls of bacteria or the lipid envelopes of viruses.
- As surfaces are scrubbed and debris loosened, it becomes surrounded and trapped by surfactant molecules (i.e., forms a micelle), which allows the pieces to be washed away during rinsing.
Good to know: Surfactant classifications
Surfactants vary in chemical structure, particularly in the charge of the head group (the hydrophobic tails are often chemically similar). This charge affects the detergency (or cleaning power) and the antimicrobial efficacy of the cleaning product. Most commercial detergents are a combination of anionic (negatively charged) and nonionic (neutral-charged) formulations.
The chemical composition of surfactants (e.g., anionic, cationic) can enhance or interfere with the disinfection process. The cleaning product used must be compatible with the disinfectant selected. Some disinfectant products may be formulated with a detergent component. Cleaning products may also incorporate other chemical components, such as enzymatic agents, such as proteases (which break down proteins), lipases (which break down fats), and amylases (which break down starch), to further aid the cleaning process.
The following table summarizes the characteristics of surfactant types and highlights their detergency or antimicrobial efficacy.
Table 2. Types and characteristics of various surfactants.
| Surfactant Type | Chemical charge (depending on pH of solution) | Detergency (cleaning power) | Antimicrobial efficacy | Examples |
|---|---|---|---|---|
| Anionic | Negative charge | +++ | +/- | Soaps, sodium lauryl sulfate |
| Nonionic | Neutral charge | +++ | – | Polysorbates |
| Cationic | Positive charge | + | +++ | Quaternary ammonium compounds (QAC), such as benzalkonium chloride |
| Amphoteric | Variable based on pH | ++ | +++ | Betaine, alkyl methyl oxide |
The Disinfection Process
The second phase of the C&D process is disinfection. This is needed to inactivate or kill remaining microbes, and may involve either physical or chemical processes.
Disinfectant Preparation
Disinfectant selection: The choice of a disinfection method or product depends on several factors, including the targeted microorganism, the surface or object being treated, environmental conditions, and health and safety considerations. Additional information on disinfectant selection is found later in this document.
Read the product label: Always prepare disinfectants according to product label instructions. Products differ in formulation. Some products are ready to use, others require dilution. Fresh solutions are best and should be prepared daily or as specified on the label. Only use EPA-registered products. One U.S. gallon of diluted disinfectant is ordinarily applied to approximately 100-150 square feet (9-14 m2) of surface area.
Use the proper concentration: The safest, most effective concentration will be listed on the product label. The required concentration may vary depending on the surface type or the target microorganism. Stronger solutions are not always better. Higher concentrations can damage surfaces or pose health or safety risks. Underdilution may not be effective against the microorganisms of concern.
Check the amount of active ingredient in stock and prepared solutions: Chemical disinfectants can degrade or lose potency over time. Check the product for an expiration date. Commercial test kits are available for most products to determine whether chemical degradation has occurred or whether diluted (“use”) solutions contain the required amount of active ingredient.
Prepare safely: Prepare disinfectant solutions in a well-ventilated area. Personal protective equipment (e.g., gloves, eye protection) should be worn. Always pour the chemical into water, not water into the concentrate. Some disinfectants can have strong chemical reactions when water is added.
Disinfectant Application

The application of chemical disinfectants most often involves spraying, fogging, misting, wiping, or mop-on methods. Small, portable items can be soaked in a container of disinfectant solution. The application instructions for a particular product will be listed on the label.
Fumigation may be used in some situations, but it is inefficient or ineffective in buildings with ill-fitting doors and windows or damaged roofs. It also requires higher levels of PPE and, oftentimes times specific training. Fumigation is uncommon except in select circumstances.
As with cleaning, disinfectant application should be systematic (e.g., top to bottom, front to back, working in small sections) to ensure all areas are adequately treated. It is essential to pay close attention to corners, deep cracks, crevices, pits, pores, or other surface irregularities. These areas can serve as reservoirs for pathogens. Floor drains should be the last areas disinfected.
Contact Time
Regardless of the chosen disinfection method, it is critical to ensure the full contact time is achieved. This is a commonly overlooked step, and often leads to disinfection failure!
The disinfection process is not instantaneous; it takes time to work. Contact times vary depending on the product or method used, the concentration, the type of surface being treated, and the ambient temperature. Some may require 1-5 minutes, but 10 minutes or more is common; some may require hours, especially for resistant pathogens.
Surfaces must remain exposed (e.g., wet with disinfectant solution) for the full contact time. This can be a challenge during high temperatures. Some chemical disinfectants, particularly alcohols, evaporate quickly. Reapplication may be necessary to ensure the required contact time. Ensure cracks, crevices, and joints remain exposed for the entire contact time.
Rinse Away Disinfectants
After the appropriate contact time has elapsed, all items or areas should be thoroughly rinsed with clean water. Most chemical disinfectants can be harmful to animals and must be rinsed away before animals are reintroduced. This is especially important around feed and water equipment. Some products can also damage certain surfaces, such as rubber or metal, if they are not completely rinsed away. However, some products may have residual activity and can remain on surfaces, continuing to work.
Drying/Down Time
After rinsing, treated areas or items should be dried completely (ideally overnight). Applying disinfectant solutions uniformly over large areas (e.g., ceilings, walls, floors) can be very difficult. Adequate downtime helps to further reduce or eliminate any remaining microorganisms. The area should remain free of any animals or activity during this time.
Other C&D Considerations
Biofilms
Biofilms, invisible complex aggregations of bacteria, may persist on surfaces. Biofilms are highly resistant to disinfection. The use of detergents, mechanical scrubbing, brushing, and scraping can help remove biofilms.
Personnel Health and Safety
Personal protective equipment (PPE) should always be worn when preparing and applying disinfectants. Recommended PPE for a particular product will be listed on its label. At a minimum, this should include eye protection and gloves. Water-resistant disposable outerwear (e.g., coveralls, boots) should be strongly considered. Respiratory protection (e.g., masks, possibly respirators) should be worn when preparing powdered formulations or for products with strong odors. Personnel should always wash their hands after C&D procedures – even if gloves were worn.
One-Step Disinfectant Cleaners
Some disinfectant products may be formulated with a detergent component as a one-step product. Organic matter still needs to be removed for these products. Most are labeled for use on cleaned surfaces, so the cleaning step is still needed. Some require washing surfaces after disinfection, particularly when animal restocking or exposure is anticipated.
C&D in Cold Temperatures
Many disinfectant products are affected by temperature and may become ineffective in cold weather. Solutions may also freeze on surfaces when outdoors. Possible solutions for C&D in cold temperatures include heating surfaces or buildings to prevent freezing, using heat blankets around liquid containers, or adding antifreeze agents (e.g., propylene glycol). Some disinfectants may be compatible; others are not. Always read the product’s label instructions for use in cold conditions.
Don’t Forget the C&D Equipment
After completing the C&D procedure, any equipment used during the process (e.g., shovels, hoses, pressure sprayers, pumps, any heavy equipment or vehicles) should also be properly cleaned and disinfected. Some disinfectants can be corrosive or damaging, and should be rinsed away. Disposable C&D supplies (e.g., paper towels) should be discarded. Any unused disinfectant concentrate or solutions should be properly stored or disposed of in accordance with the label instructions.